Search This Blog

Showing posts with label recipe. Show all posts

Wednesday, March 10, 2021

Camp Food: What We Ate On Our Weekend Camping Trip

There are so many components to camping, but one of my favorites, is the food!


My little family recently took a weekend trip to Shawnee National Forest in Southern Illinois. We arrived on Friday afternoon and left on Saturday afternoon, which left us with 2 breakfasts, 2 lunches, and 2 dinners to plan and execute. So, here's what we ate!

For our first dinner, we decided to go classic camp food: Hot dogs made over a fire. To add a little extra substance to our meal, we also made a pasta side on our camp stove. And of course, S'mores for dessert! This was an easy, yet delicious, meal.


The next day, we woke up and made pancakes (with mini chocolate chips for my son) with some warmed up, precooked sausage on the side. And of course, we had to have some coffee to wake us up!


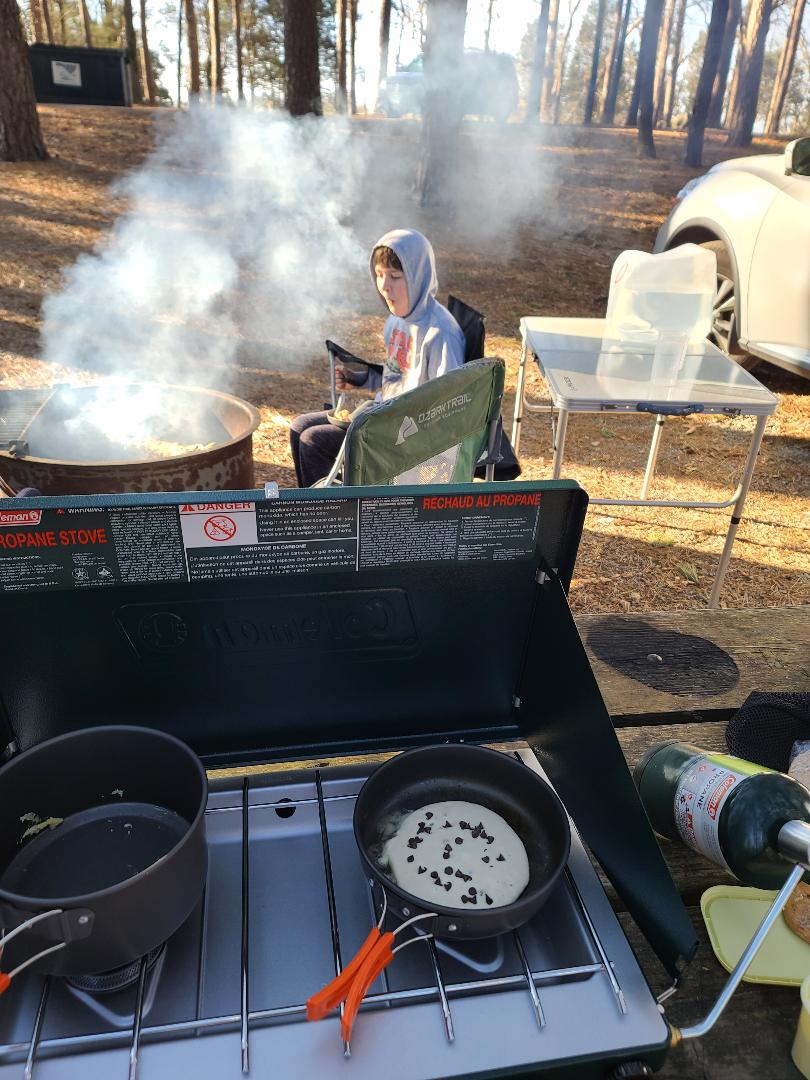
Tip: Make your meals as uncomplicated as you can. While we loved our breakfast, the pancakes took way longer to make than I had anticipated since we could only make 1 pancake at a time.

For lunch, we just made sandwiches with lunchmeat and cheese and had an apple and chips on the side. (We were in a hurry though, so I didn't take any pictures.)

Next up: dinner! We made some campfire dip, which was absolutely delicious! Here's the recipe:
In an 8x8 foil pan, spread a brick of cream cheese on the bottom. Pour a can of chili beans in chili sauce on top. Spread a pound of pre-cooked ground beef cooked in taco seasoning. Then, top with 2 cups of taco cheese. Cover with foil. Cook over a fire, or on a camp stove, or any way that is available to you. Stir a couple times so that nothing burns. Eat with Frito Scoops.

To make this just a smidge healthier, we made it with Neufchtel (1/3 less fat cream cheese), low fat taco cheese, and turkey instead of beef.


Tip: Don't forget about the dishes you'll need to do! Because we didn't want to handwash plates with tons of cheese dip on them, we just ate right out of the foil pan and then threw away the pan when we were done.

Tip: Prep what you can in advance. Yes, we could have made the taco meat at our camp, but it was way faster and way less effort to just make it at home, put in in a sandwich bag, and then pull it out of the cooler when we were ready to make it! Easy peasy!

The next morning we made scrambled eggs and turkey bacon with coffee for breakfast. It was so simple, yet so great to have hot breakfast to start our day with.

To make scrambled eggs for 3, I whisked together 6 eggs, 6 Tablespoons of milk, 1/2 teaspoon salt, and 1/2 teaspoon pepper together. Cook over medium heat, stirring often, until eggs are the texture you enjoy.


For our coffee, we used these pour over filters from Amazon and just made some hot water in our little kettle on the camp stove.


Our last meal for this trip was lunch. We stopped at a picnic table before our last hike and ate some sandwiches and veggie straws. Super simple. And easy to make out of the back of our car in just a matter of minutes.


That was all the food we ate! Well, except for a couple oreos and some popcorn we had packed for snacks. Camp food shouldn't be complicated. And it helps to prep some stuff in advance. And worse case scenario, go find a restaurant. Don't be scared of cooking while camping, just make sure you leave yourself plenty of time in your schedule. and ENJOY!

Wednesday, February 3, 2021

Recipe: Healthy Dessert Apple Nachos

I LOVE dessert. It's my favorite part of any meal! But when you're trying to eat healthy, it's not always eay to even have dessert, let alone enjoy it. So, here is one of my favorite easy desserts when I have the calories to spare.

Ingredients:
1 apple
2 Tbsp peanut butter
2 Tbsp mini chocolate chips

Steps:
1. Cut your apple into thin slices or rings and place on a plate.
2. Microwave your peanut butter until it is fully melted. This will make your peanut butter appear to go further and get an even coating on all of the apple slices. Pour the peanut butter in a drizzle all over the apples on your plate.
3. Sprinkle the mini chocolate chips evenly over your apples.
Serve and enjoy!

I know this is really simple, but I just love eating them!

Sunday, January 31, 2021

Recipe: Breakfast Cookies

I recently tried a new recipe, changed it a little to make it a little more me, and I seriously love it. Bonus: My husband and son love these as well! Extra Bonus: They're pretty healthy for you! I was hesitant to call these cookies because they're more reminiscent of muffin tops, but we'll stick with the word cookies because those are more fun to eat! Right?


Ingredients:
1 cup whole-wheat flour
¾ cup all-purpose flour
½ cup Hershey’s special dark cocoa
1 ½ Tbsp instant coffee
1 ½ tsp ground cinnamon
1 tsp baking soda
½ tsp kosher salt
3 large eggs, lightly beaten
1 ripe banana, peeled, microwaved 30 seconds, then mashed
½ cup nonfat plain Greek yogurt
½ cup honey
1 Tbsp vegetable oil
2 tsp pure vanilla extract
1 ¼ cups blueberries
¾ cup mini semisweet chocolate chips

Instructions:
1. Heat oven to 350 F. Line 2 large baking sheets with parchment paper.

2. In a large bowl, whisk together flours, cocoa, coffee, cinnamon, baking soda, and salt.

3. In another bowl, whisk together eggs, banana, yogurt, honey, oil, and vanilla until well combined (small lumps of banana are OK).

4. Stir egg mixture into flour mixture, gently stirring until just incorporated. Fold in blueberries and chocolate chips. Do not overmix.

5. Scoop balls of dough, about 1 ½ Tbsp each, onto prepared sheets, about 2 in apart. Flatten cookies slightly by pressing lightly with fingers or back of fork (to keep from sticking, use nonstick spray).

6. Bake until firm around the edges, 12 to 14 minutes. Let cool completely on sheet on wire rack.

Servings: 40
Calories: 73 (When I made these, I used a small scoop and ended up making 46, making them 63 calories a piece.)


I hope that you like these as much as my family does. I put two "cookies" in a snack bag and then put those into a bin. Now, we have an easy 146 calorie breakfast filled with fruit and chocolate that we can just grab in the morning with no extra prep.

Wednesday, January 20, 2021

Recipe: Taco Bowl

One of my son's favorite foods is tacos. So, when we started eating healthier and I saw how many calories were in a single tortilla shell, I knew we had to do something else. My husband and I did a little thinking and decided to make a taco bowl, instead. We got our inspiration from Chipotle and Taco Bell. So, I'm here to share that recipe with you, today!


Ingredients:
1 lb ground turkey
1 packet of taco seasoning
1 can pinto beans
1 can corn
Salsa
Low-fat cheese
2 cups Brown rice (4 cups cooked)

Instructions:
1. Cook rice, corn, beans, and taco meat according to the directions on the container.
2. Layer rice, pinto beans, corn, and turkey taco meat, using 1/5 of each. Top with one serving each of salsa and cheese.

Servings: 5
Calories: 480

We love to eat this, probably at least every other week if not once a week. It is so filling and definitely works with my "diet".

Tuesday, December 22, 2020

It's Christmas! Day 22: Baking Cookies

It’s Christmas! is a 25 day blog and vlog segment that I’ll be doing this December to bring you crafts, reviews, and ideas to make your Christmas season even more fun this year (especially, with this pandemic thing we’re all trying to navigate).

Hopefully, my family can inspire yours to not let this crazy year ruin the holiday season for you.

Today, we are preparing for Santa’s visit in just a few short days by baking some cookies. We’ve decided to go for the traditional sugar cookies (hopefully decorated beautifully!). But, decorations are for tomorrow. Today, we’re just making the cookies. There is a sugar cookie recipe that I have used multiple times that I love. These taste a lot better than other sugar cookies I’ve had. I mean, not to toot my own horn...but toot toot!

So, first thing’s first, let’s get our supplies together. We’ll need cookie sheets, parchment paper, 1 cup measuring cup, 1 teaspoon measuring spoon, a rolling pin, 2 mixing bowls, whisk, and electric beaters.
Then, we’ll get our ingredients together. We’ll need flour, baking powder, unsalted butter, sugar, an egg, and vanilla extract.

First we’re going to whisk together 3 cups of flour and 1 teaspoon of baking powder.
In a separate bowl, we’re going to beat together 1 cup of unsalted butter and 1 cup of sugar. Then, we’re going to add in an egg and some vanilla and then mix it up again.
Now, we’re going to slowly add in the flour mixture about a cup at a time. We want to mix our dough until it begins to clump together (possibly not using all the flour).
Then, we’re going to gather up our dough and knead it with our hands until it’s nice and smooth. We’re going to roll it into a ball, wrap it with plastic wrap, and place it in the fridge for about half an hour to chill. You want it to be a little firm, but not hard.
It’s time to preheat the oven to 350 degrees, take our dough out of the fridge, and roll it out. We’re going to cut shapes out with cookie cutters and place those on a cookie sheet lined with parchment paper.
Then, we’re going to place these in the freezer for just a couple minutes to make sure they don’t lose their shape while they’re in the oven.
We’re just going to pop these in for about 8 minutes and just check on them from there. Cooking time will depend on the size and thickness of your cookies.

Now that these are done, we’re going to let them cool overnight. Come back tomorrow to decorate them with us! And as always, from my family to yours, Merry Christmas!

Monday, December 21, 2020

It's Christmas! Day 21: Wrapping Christmas Presents PLUS Homemade Hot Cocoa Mix

It’s Christmas! is a 25 day blog and vlog segment that I’ll be doing this December to bring you crafts, reviews, and ideas to make your Christmas season even more fun this year (especially, with this pandemic thing we’re all trying to navigate).

Hopefully, my family can inspire yours to not let this crazy year ruin the holiday season for you.

Ok, I have a confession to make. While I absolutely love Christmas and do consider myself pretty crafty, no matter how hard I try, I stink at wrapping presents. Like seriously, I try every year, but it’s just not that pretty. I don’t know what to tell you. So, I’ve decided to embrace the bad wrapping and have my son help me. That way, if anyone says anything, he wrapped them. Yeah, I know, I totally am throwing my son under the bus. Oh well.

Let’s get wrapping!

Phew! That was exhausting and felt like it took forever! But now it’s done. Want to see? Here are our presents, ready to be opened on Christmas morning!

Now that we're done wrapping presents, it's time to make some hot chocolate. But we're not going to make it for ourselves. Remember when we made our neighbors some gift baskets? Well, inside them, we placed some jars of hot cocoa mix, so today, we're going to show you what went into those.

First, we grabbed 4 16 oz glass jars.
We added our ingredients to each jar in even layers.
First is 1/3 cup of sugar.
Then, 1/3 cup of cocoa powder.
Next up is a layer of finely crushed candy canes (3 to be exact).
Then, 1/3 cup of mini chocolate chips.
Finally, we top our jar with 1/2 cup of mini marshmallows.

Tips:
- Add candy canes to a plastic bag and use a rolling pin to finely crush.

- Use a funnel to prevent spills and ensure even layers. Build a wide-mouth funnel by rolling paper into a cone and taping it in place.

Now that we're done filling our jars, we're going to screw on the lid, add a gift tag with instructions, and top it with a bow.

This is what our tags said:

Peppermint Hot Cocoa
You will need:
1 jar cocoa mix
6 cups milk

Steps:
1. Remove marshmallows from jar. Set aside.
2. Whisk cocoa mix and milk in pot set over medium heat until hot.
3. Pour into 4 mugs and top with marshmallows.

Don’t leave your wrapping until Christmas Eve. And make some homemade hot cocoa to share!

As always, from my family to yours, Merry Christmas!

Saturday, December 19, 2020

It's Christmas! Day 19: Making Christmas Candy

It’s Christmas! is a 25 day blog and vlog segment that I’ll be doing this December to bring you crafts, reviews, and ideas to make your Christmas season even more fun this year (especially, with this pandemic thing we’re all trying to navigate).

Hopefully, my family can inspire yours to not let this crazy year ruin the holiday season for you.

In years past, we’ve made all different kinds of Christmas candy. From peppermint bark to chocolate peanut clusters, we’ve made it all. However, this year, we’re trying to eat healthier and be more conscious of our calorie intake. But that doesn’t mean that we need to eliminate all Christmas candy. So, we’ve limited it to just one kind this year.

This candy means a lot to me because my grandma used to make it. And since she’s not around anymore, it’s up to me to carry on the tradition. Plus, this is the candy that we put in our neighbor gift baskets.

So, we’re going to get started.
First, we need our supplies. We’re going to gather our double boiler, pot, spatula, wax paper, cookie sheet, 1 cup and ½ cup measuring cups, and a small scoop.
Now for our ingredients, we’re going to get 1 lb of almond bark, peanut butter, crisp rice cereal, dry roasted peanuts, and mini marshmallows.

We’re going to fill our pot with water, making sure it JUST touches the bottom of the double boiler and then put it on medium heat.
Let your water heat up for a couple minutes, about 5, and then we’re going to add our almond bark. Our goal now is just to get it melted. This will probably take a bit of time, but we want to melt it slow so as to not add too much heat.

After our almond bark is at a smooth consistency, it’s time for us to add our other ingredients. First, we’ll add 1/2 cup of peanut butter and mix that up really well. Then we’re going to add 1 1/2 cups of crisp rice cereal and 1 cup of dry roasted peanuts. Again, we want to mix that up.
Then, we’re going to add 1 cup of mini marshmallows. We want to stir that quickly and get our scoop to portion out our candies because we don’t want the marshmallows to melt.
As we scoop out our portions, we put them on wax paper and allow them to cool.
That’s it! Now that our candies have cooled for about half an hour, they’re ready to eat. And these don’t last very long in my house.

I hope you enjoy. And as always, from my family to yours, Merry Christmas.

Friday, December 18, 2020

It's Christmas! Day 18: Make a neighbor gift basket PLUS Chocolate Snowball Cookies

It’s Christmas! is a 25 day blog and vlog segment that I’ll be doing this December to bring you crafts, reviews, and ideas to make your Christmas season even more fun this year (especially, with this pandemic thing we’re all trying to navigate).

Hopefully, my family can inspire yours to not let this crazy year ruin the holiday season for you.

The most important part about Christmas is giving. Whether you’re giving thanks, giving presents to your family, giving money to charity, giving toys to kids in need, or just giving a little Christmas cheer to other people, you’re truly embracing the true meaning of Christmas. In my house, we celebrate the birth of Jesus Christ and talk about being kind and how God has given so much to us. However, whether you live in a religious household or not, giving is such an important lesson to learn.

So, while we do try to do multiple things to give back during the holiday season (like ringing bells for the salvation army or random acts of kindness), today we’re talking about making a gift basket for a couple neighbors. We want to spread some Christmas cheer and make our friends feel special.

There were a couple things we needed to consider.
Will people actually eat cookies if we make them? (You know, due to this whole Covid thing.)
How much do we want to spend?
Who do we want to make gift baskets for?

After we answered these questions, we got to putting our baskets together. We included some homemade chocolate cookies, homemade candy, a jar of homemade hot cocoa mix, some finger puppets, a couple crafts, pencils, sharpeners, erasers, stickers, and notebooks.

Here's how we made the cookies that we ended up including:

Ingredients:
1 2/3 cups flour
1 1/2 tsp baking powder
1/2 cup cocoa powder
1/4 tsp kosher salt
1/2 cup butter, softened
1 1/4 cups + 1/3 cup sugar
2 eggs
1 tsp vanilla
1/2 cup powdered sugar

Steps:
1. Add flour, baking powder, cocoa powder, and salt to medium bowl. Mix to combine. Set aside.
2. Add butter and 1 1/4 cups sugar to large bowl. Beat with electric mixer until light and fluffy.
3. Crack eggs into small bowl. Throw away shells and wash your hands.
4. Add eggs and vanilla to butter mixture. Mix until smooth and creamy.
5. Add dry ingredients to wet ingredients. Mix until a soft dough forms.
6. Cover dough and refrigerate 1 hour.
7. Preheat oven to 350 degrees. Line 2 baking sheets with parchment paper.
8. Scoop a level tablespoon of dough. Roll into a 1-inch ball. Repeat to use all cookie dough.
9. Add 1/3 cup sugar to one small bowl. Add powdered sugar to another small bowl.
10. Make snowballs! Dip each ball of dough in sugar, then dunk generously in powdered sugar to coat.
11. Set dough on baking sheets.
12. Bake 10 minutes. Cool 10 minutes. Serve.

I think they turned out pretty good! And they taste delicious!

Owen had a blast running up to their houses and putting our little gifts on their front porch!

So do something kind for someone else!

And as always, from my family to yours, Merry Christmas!

Hocking Hills State Park

A couple weeks ago, we decided to take a weekend trip to Columbus, Ohio for my son’s 11th birthday. Our whole trip started because we just H...